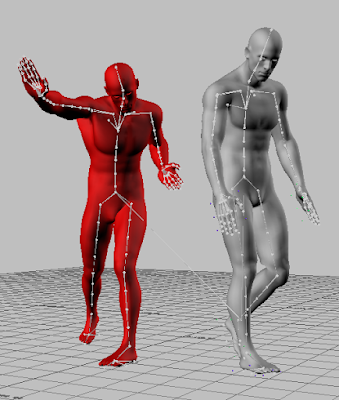
Generating these poses in MotionBuilder can be a fairly simple process, in which all one must do is replicate a real-time driven character rig, and snap all of the duplicate character rig’s joints to their real-time rig counterpart.
The Create Pose Instance tool does just that:
The UI for this tool is composed of:
- a character selection dropdown - this lists all current character rigs in your scene
- a refresh button - refreshes the character selection dropdown, should you introduce any additional characters into your scene after opening this tool
- a pose material color dropdown - this lists color options for the pose
- a ghost mesh checkbox - if checked, a lighted shader will be applied to your new pose, making it transparent
To start the process off, I first instantiated a collections OrderedDict. This OrderedDict is an easy place to store and access all original char rig joints, the duplicate char rig joints, and the constraints that we will use to snap the dupe joints to their original joint counterparts*. We use an OrderedDict so that the order in which we append joints to the dictionary is maintained, so that joint hierarchy is respected as we alter joint positioning (ensuring we move parent joints before their children).
With the particular character rig identified, we can parse through all of its character links, appending them to the OrderedDict as we go. Doing so, we introduce joints to the dictionary with respect to their place in the skeleton’s hierarchy, ensuring everything is top down. For this snippet of code, 'charName' is the variable assigned to the user selected character in the scene that we want to create a pose for:
Additionally, we use a try and except to bypass any links that do not contain any objects, and eliminate any potential errors.
*One of the easiest methods I have found in MotionBuilder to snap an object in the scene to the location of another object is by the use of simple parent constraints. When you set up said constraint, and activate it, the constrained object immediately assumes all translation and rotation values of its source object. We could just as easily go in and snag the FBVector3d values for the source object’s translation and rotation properties and assign them to the constrained object…but in this case, the added bonus for using these constraints is that we eliminate any potential risk of accidental offsets. Since the constraint remains active as we work our way down the skeleton hierarchy, the joints are effectively locked down after they’ve all been placed properly, ensuring none of them can be altered until after all joint locations have been updated.
Once all joints are set, the constraints can be deactivated, and deleted out from the scene.
Typically, if a character rig is being driven by streamed data from a motion capture software package, the time frame in MotionBuilder will not be altered. However, this tool has appended code that takes into account the scene current time frame. As an added step, the tool will evaluate your scenes local time span (start and end frame), as well as the current set time frame. Before the joints of the duplicate character rig are adjusted, the tool resets the scene's local time span, and uses FBPlayerControl to go to the proper timeframe, making it so you can use this tool outside of real-time altogether.
In this example, the script was set to read the current time frame, and assign it to the variable ‘currentFrame’. The scene start and end frames are also assigned to the variables ‘startFrame’ and ‘endFrame’ respectively:
As previously mentioned, a little add on that can be done is adjusting the pose mesh’s transparency, to differentiate it from any other character mesh in the scene, and make it easier for an actor to line up with. The tool does this by assigning a lighted shader to the pose’s mesh, and adjusting the shader’s transparency and alpha settings. In this example, ‘self.poseRigLightedShader’ is the variable to which the shader has been assigned:
Real-time rig:
First pose applied (colored red):
Second pose applied (colored green, and ghosted):


