Overview:
The Cinematic Setup tool was created to automatically generate and/or update the core components of a cinematic inside of Unreal's sequencer.
Worth noting, the pipeline this tool was created for utilizes master sequences which contain separate sequences for each shot (broken down into three types of sequence asset per shot: one for animation, one for fx, and another for lighting). I set things up this way to enable multiple disciplines to work on the same cinematic simultaneously without blocking each other.
Additionally, the pipeline also works with core levels (referred to as 'persistent levels') and sublevels. As they pertain to cinematics, each cinematic has it's own sublevel. These sublevels store all components relevant to the cinematic itself, and allow us the ability to stream this content only when the cinematic is being played (keeping level size and load time to a minimum).
Based off of user selection, the tool has the capacity to:
- Establish the core shot folders used to store the given cinematics' asset files
- Generate all sequencer assets for the given cinematic, including it's master sequence and all cinematic shot sequences
- Setup camera animations for all cinematic shot animation sequencer assets
- Setup skeletal mesh animations for all cinematic shot animation sequencer assets
- this includes all bindings and tracks associated with all relevant skeletal mesh actors
- Setup shot sections and framing in cinematic master sequence
- Generate a cinematics' sequence sublevel and populate it with:
- all skeletal mesh actors in the cinematic
- all cinematic camera actors in the cinematic
- the cinematics' master sequence as a level sequence actor
- the tool will also ensure only one level sequence actor instance of said master sequence exists in the sequence sublevel
- the master sequence level sequence actor will have all tags necessary for our pipeline assigned to it
- worth noting: all of these components will be neatly grouped inside of the sequence sublevel and added into a hierarchy of group nodes that further customize move options for the components in the scene without disturbing any sequencer content assigned to them.

Tool Workflow:
To begin, identify which kind of cinematic you want to work on, and whether or not you are setting up a new cinematic or updating one that already exists. Worth noting: if working from pre-existing cinematics, the tool will list all previously generated assets for said cinematic, and assume you only want to generate assets for anything that may be missing. The checkboxes next to each section (Shot Folders, Sequence Sublevel, and Sequence Assets) tell the tool which assets to generate and/or update, and the tool will only create/modify what is checked. Any issues preventing the tool from being successfully used will be noted in a tool tip that is visible when hovering over the 'Create Cinematic' button at the bottom of the tool, and the button will be disabled until the tool can verify no errors will be encountered during use:
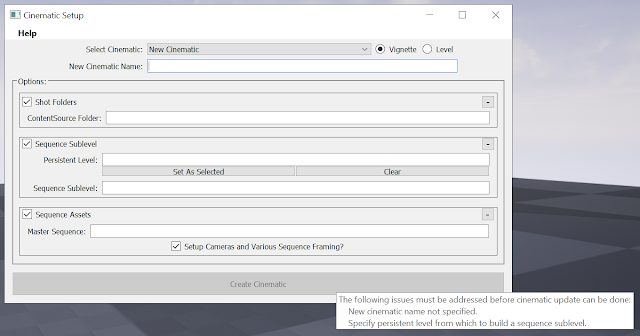
In this example, we will create a new vignette, composed of 3 shots which we already have animation data for. These animations have all been named accordingly and placed in the appropriate folders (both the source FBX files as well as the animation uasset files):
When entering a name for the cinematic, the tool will parse our content folder structure. If a cinematic folder matches the given name, the tool will automatically link to said content folder and determine how many scenes and shots have already been established for said cinematic.
Shot numbering is based on the scene and shot number of a given shot. For instance, the third shot of the first scene is shot number 1030. The given pipe uses scene numbers to organize which shots belong in which animation source files.
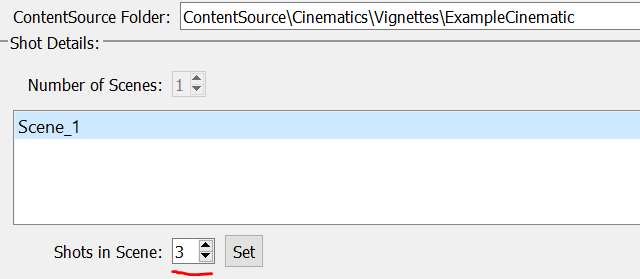
The list in the shot details portion of the tool contains an entry for each scene. When selected, the number of shots in that scene will be listed in the 'Shots in Scene' combo box:
The tool is non-destructive and shots and scenes can only be added, never removed. This ensures that no content is ever accidentally deleted through tool use. Any shots added to the list will have sequencer assets generated for them, regardless of whether or not there is any source content (like animation).
You will also notice that a master sequence was listed as soon as a name was entered. All asset naming is controlled by the cinematic name itself.
The next step is to identify the persistent level that the cinematic takes place in. Once selected, the 'Sequence Sublevel' category will automatically update to list the sequence sublevel that the tool is going to generate for the cinematic.
Tool Output:
With everything filled out, click the 'Create Cinematic' button and the tool will complete the following:
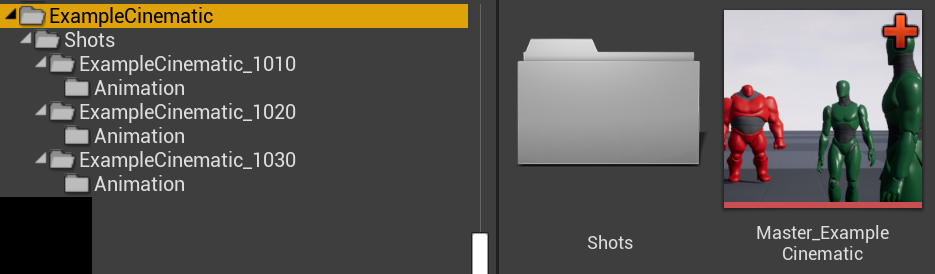
- all skeletal mesh actors, cameras, and level sequence actors will be added into a sequence sublevel, which is stored in a subfolder inside your persistent level's directory:
- an animation, fx, and lighting sequence asset will be generated for each cinematic shot:
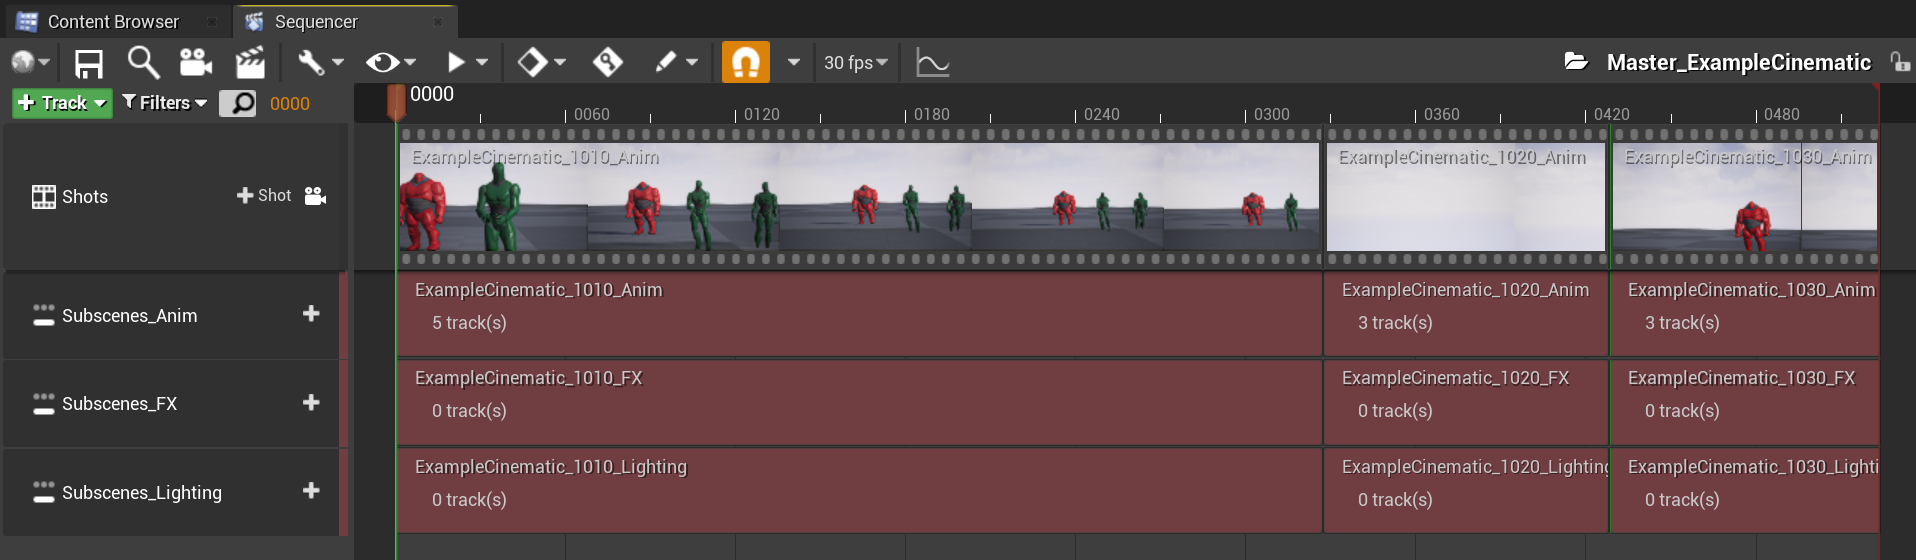
- each animation shot sequence will have it's skeletal mesh actors and camera actors setup in tracks where animations will be applied to them accordingly, and all attributes will be modified to our pipelines specifications:
- a master sequence will be created, and all shot sequences will be added into the master sequence according to shot number: